


By using our website, you agree to the use of cookies as described in our Cookie Policy
Blog
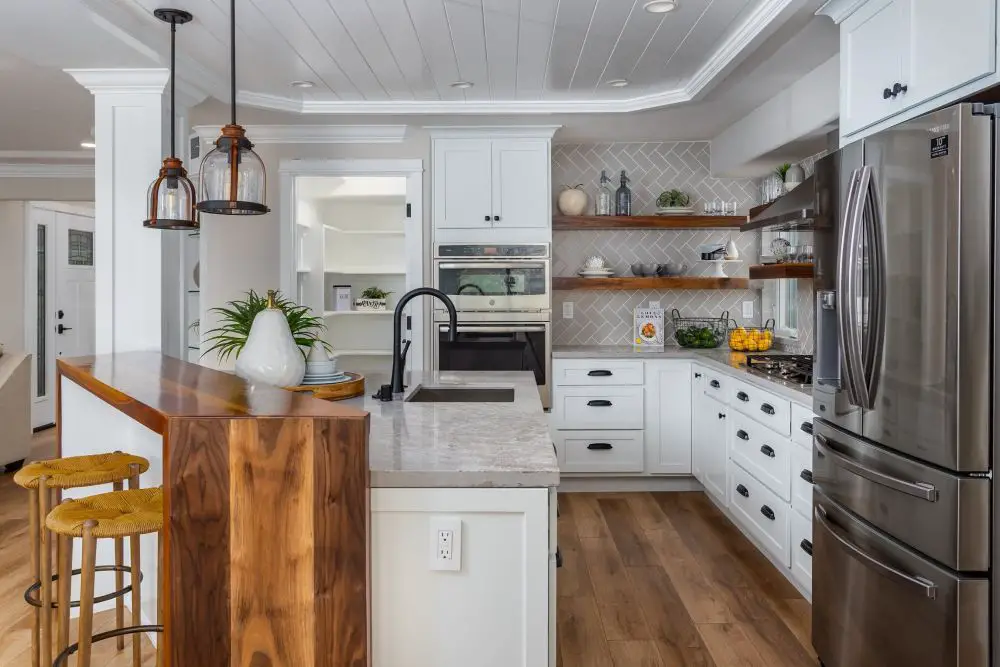
Designing a Kitchen Island That Actually Works

Kitchen Remodeling · Design & Planning
Designing a Kitchen Island That Actually Works
The decisions that separate a beautiful island from one you use every single day.
"The best island isn't the most beautiful one on Pinterest. It's the one you interact with the same way on a Tuesday at 7am that you imagined yourself using it on a Saturday evening."
Start With the Job, Not the Style
Before dimensions, countertop materials, or pendant heights, the most important island question is: what is this island's primary job? Not three jobs. One primary job, with others secondary.
Every island that fails — visually, functionally, or both — fails because someone tried to make it do too many things at equal priority. A beautiful waterfall-edge prep island with a sink and a cooktop and seating for five sounds like it has everything. In practice, it's a traffic problem with a stunning countertop.
Primary Job A
Prep & Work Surface
Counter space for chopping, mixing, staging, and everything that happens before food hits the stove. The workhorse island. Should be at standard counter height (36"), positioned with clear access to the refrigerator and prep sink without crossing the cooktop traffic path.
Counter Height 36"Needs OutletMax Clearance
Primary Job B
Seating & Gathering
Where family sits while someone cooks, where homework gets done, where the Saturday morning newspaper lives. Requires an overhang of at least 12" at counter height or 15" at bar height for knee clearance, and stools that suit the household — not stools that look good in a showroom.
Overhang 12–15"Bar Height 42"Stool Height Matters
Primary Job C
Cooking Station
A cooktop or range in the island — the social cooking configuration, where the cook faces the room. Requires ventilation (a ceiling-mount or downdraft hood), dedicated gas or electrical service, clearance on all sides for safe operation, and a conversation about whether you actually want to cook while facing your guests.
Ventilation RequiredDedicated CircuitSocial Cooking
Primary Job D
Storage Hub
Deep drawers for pots and pans, pull-out recycling, appliance garages, or a beverage station. The storage island works best when it replaces peninsula or lower cabinet storage that the kitchen layout doesn't naturally provide — not when it competes with counter space.
Deep DrawersPull-OutsBase Height Standard
The Question We Ask Every Client
Before we discuss a single dimension or material: "Walk me through a Tuesday morning in your kitchen." Not a dinner party. Not Thanksgiving. A normal Tuesday.
You learn more about what an island needs to do from a Tuesday than from any inspiration board. Does someone make coffee while someone else makes lunches? Do kids sit at the island before school? Is the countertop constantly covered with something, or does it stay clear? Is the homework laptop plugged in at the island or at the dining table?
The design follows the behavior. Not the other way around.
Dimensions: The Numbers That Can't Be Compromised
Clearance measurements for kitchen islands are not suggestions. They're the difference between a kitchen that flows and one where two people can't pass each other without turning sideways. These numbers represent the minimum — go larger whenever the floor plan allows.
Island Clearance Specifications
All-Around Clearance
36" minimum
Adequate for one person; 42–48" preferred for active two-cook households or accessible kitchens
Cooktop Clearance
42" minimum
Between island cooktop and facing cabinets; 48" strongly preferred for safety
Minimum Island Size
4' × 2'
Smallest usable footprint; anything smaller is a peninsula extension, not an island
Counter Height
36"
Standard working height; matches perimeter counters for continuous workflow
Bar Seating Height
42"
For bar stools (28–30" seat height); requires overhang of 15"+ for knee clearance
Counter Seating Overhang
12" minimum
For counter-height seating (24–26" stool); 15" is more comfortable for extended sitting
Design Concept: The Work Triangle (And Why Islands Complicate It)
The kitchen work triangle connects the three primary work stations — refrigerator, sink, and cooktop — into an imaginary triangle. The traditional rule is that each side of the triangle should be 4–9 feet, with total perimeter under 26 feet. An island placed in the center of an efficient work triangle can interrupt it, adding extra steps to every task. The island should complement the triangle's flow, not cut across it. This is why island placement starts with where your fridge, sink, and cooktop are — not with where the island would look best photographically.
Countertop Materials: An Honest Assessment
Island countertops take more abuse than any other surface in the kitchen — hot pans set down hastily, kids doing homework, someone chopping directly on the surface without a board. The material needs to hold up to how the island is actually used, not just how it photographs.
| Material | Heat Resistance | Scratch Resistance | Stain Resistance | Best For |
|---|---|---|---|---|
| Quartz | ◐ Moderate — avoid direct heat | ✔ Excellent | ✔ Excellent — non-porous | High-use family kitchens; low maintenance priority |
| Quartzite (natural stone) | ✔ Good | ✔ Very good | ◐ Moderate — needs sealing | Those who want natural stone without marble's maintenance |
| Marble | ✔ Good | ✗ Poor — scratches and etches | ✗ Poor — absorbs acids | Light-use kitchens; those who accept patina as part of the look |
| Butcher Block (wood) | ✗ Poor — will scorch | ✗ Poor — shows knife marks | ◐ Moderate — oil regularly | Prep section of a two-material island; cozy aesthetic priority |
| Concrete | ✔ Good | ◐ Moderate | ◐ Moderate — must be sealed | Custom modern kitchens; those who want truly one-of-a-kind |
| Porcelain slab | ✔ Excellent | ✔ Excellent | ✔ Excellent | High-performance kitchen; waterfall edges; modern aesthetic |
A note on two-material islands: using different countertop materials on the perimeter counters vs. the island is a legitimate design and functional choice — butcher block on the island prep section with quartz perimeters, for example. The key is planning the seam and transition cleanly, and accepting that two materials means two maintenance routines.
The Electrical Question Nobody Asks Until It's Too Late
California electrical code requires at least one outlet on any island or peninsula that meets the size threshold (24" wide × 12" deep minimum). In practice, one outlet is rarely enough for how modern households actually use island space — charging phones, running a stand mixer, laptops during homework, a blender in the morning.
Here's the planning conversation to have before rough-in:
Island Electrical Planning Checklist
- Determine outlet count early. Two outlets on a standard island is a minimum for a functional household; three or four for a larger island or active household. Each outlet costs relatively little to add during rough-in and is expensive to add after tile and cabinetry are in.
- Pop-up outlets for clean aesthetics. Pop-up outlets retract flush with the countertop surface when not in use — no visible outlets on a minimalist island. They require slightly more counter thickness and cost more than standard outlets, but they're worth considering if the island's visual cleanliness matters to you.
- USB and USB-C integrated outlets. Many modern outlet configurations include integrated USB charging ports alongside standard plugs. Specify these during rough-in; they're the same electrical box with a better face plate.
- Cooktop requires a dedicated circuit. If you're putting a cooktop in the island, it needs its own dedicated 240V circuit (electric) or gas line (gas). This is a rough-in decision — the circuit must be planned before cabinetry installation. Confirm your electrical panel has capacity for an additional 50-amp circuit if you don't have one available.
- Under-cabinet lighting wiring. If the island has upper cabinets or a raised section, wire for under-cabinet LED lighting during rough-in. Retrofitting this after cabinetry is installed requires drilling through cabinet interiors.
Storage: What Actually Gets Used
Island storage sounds straightforward until you're staring at a finished island wondering why you specified three open shelves that now hold decorative bowls you never touch. Real island storage starts with inventory of what you actually need access to during cooking — and works backward from there.
Storage Win
Deep Drawer Stacks
Full-extension deep drawers for pots, pans, and large cooking vessels. A 24" deep drawer holds what a standard base cabinet requires you to crouch and excavate to reach. This is consistently the highest-satisfaction storage upgrade in every kitchen we remodel.
Most Used DailyFull Extension
Storage Win
Pull-Out Trash & Recycling
A dual-compartment pull-out trash and recycling drawer built into the island base eliminates the freestanding trash can that lives in the way on the kitchen floor. Position it near where prep waste is generated — typically adjacent to the prep sink or primary chopping area.
Eliminates Floor CanNear Prep Zone
Storage — Use Carefully
Open Shelves
Open shelves on an island end look great in photos and stay clean for approximately one week before becoming a surface for things that don't have another home. If you want them, commit to styling them permanently with items you'll never move — cookbooks, a specific bowl collection, baskets. Otherwise: close it with doors.
High MaintenanceStyle with Intent
Storage — Situational
Appliance Garage
A closed cabinet section in the island with a lift-up door that conceals a stand mixer, toaster, or other countertop appliances. Works best when the appliance lives there permanently — not as overflow storage for things you're looking for a home for.
Permanent Appliances OnlyNeeds Internal Outlet
Lighting Over the Island
Pendant lights over an island are one of the most-photographed features in kitchen remodeling and one of the most commonly misspecified. The common mistakes: pendants hung too high (should be 30–36" above the countertop), too few pendants for the island length (one pendant per 2 feet of island length is a good rule of thumb), and pendants selected for looks without checking that they provide adequate task light.
The light that actually makes the island functional is not necessarily the pendant — it's the recessed can light or dedicated task light positioned to illuminate the work surface without casting a shadow from the person standing at it. Plan both layers: ambient/statement lighting (pendants) and functional task lighting (recessed cans positioned in front of the island, not directly above it).
Add dimmer switches to island lighting on a separate circuit from the perimeter kitchen lights. The ability to dim the island independently — bright for prep, low for dinner, off when not in use — is one of the small-cost, high-value electrical choices that makes a kitchen genuinely pleasant to live in.
Seating: Match the Stool to the Household
The stool that photographs beautifully in a showroom is frequently not the stool that works for a household with kids, a grandmother, or anyone who sits for more than ten minutes. Height and comfort are primary; aesthetics are secondary.
| Stool Type | Best For | Comfort Duration | Notes |
|---|---|---|---|
| Backless bar stool | Quick breakfast, snacks, minimal use | ✗ Short — 15–20 min | Sleekest look; not for households that sit at the island for meals |
| Low-back bar stool | Daily casual use; most households | ◐ Moderate — 30–45 min | Good balance of look and comfort; most versatile choice |
| Full-back with arms | Extended sitting; meals at island; seniors | ✔ Long — comfortable for meals | Takes more visual space; requires slightly more overhang clearance |
| Upholstered seat | Comfort-priority households | ✔ Long | Plan for cleaning — fabric near food prep requires maintenance |
Height rule: for counter-height islands (36"), use stools with a 24–26" seat height. For bar-height islands (42"), use stools with a 28–30" seat height. When in doubt, bring a tape measure to the showroom and actually sit in the stool at the correct height before ordering four of them.
Common Questions
My kitchen is 12 feet wide. Can it fit an island?
Possibly, but it depends on layout. With a 12-foot-wide kitchen, you're working with roughly 4 feet of clear space to distribute on either side of an island once you account for perimeter cabinets. A 4' × 2' island with 42" clearance on the working sides is technically achievable in a 12-foot-wide kitchen — but just barely. If the kitchen is galley-style (counters on opposing walls), an island typically requires at least 13–14 feet of width to work comfortably. Bring dimensions to your consultation and we'll model it before anyone commits to anything.
Should the island countertop match the perimeter counters?
Not necessarily, and in many cases a contrasting island top is a better design decision. Matching the countertops throughout reads as cohesive and tends to recede visually — the island doesn't announce itself. A contrasting material — quartz perimeters with a butcher block or marble island top, for example — makes the island a design feature and allows you to use a higher-maintenance material in a more limited area. The choice is aesthetic preference plus maintenance honesty about how each material will perform in its specific location.
How do I vent a cooktop in an island with no ceiling structure above it?
This is the question that stops many island cooktop plans — and rightly so. You have two options: a ceiling-mount range hood (which requires a duct run through the ceiling cavity to an exterior vent, and structural support for the hood), or a downdraft ventilation system (which vents through the floor and requires a duct run to an exterior exit). Both are manageable during a kitchen remodel when the ceiling and floor are accessible. Retrofitting either into a finished kitchen is a significantly larger project. If you're planning an island cooktop, the ventilation solution must be confirmed before cabinetry is ordered.
What's a waterfall edge and is it worth the cost?
A waterfall edge is when the countertop material continues vertically down the end of the island, touching the floor rather than terminating with a decorative apron or exposed cabinet end. It creates a seamless, monolithic look that's visually striking in stone or porcelain slab. The cost premium is real — a waterfall edge requires additional material and precise mitering of the seam — and it's most impactful with a dramatic material like book-matched marble or large-format porcelain. In a busy family kitchen where that island end is going to take bumps from chairs and backpacks, a more durable cabinet end panel might be the more practical choice.
Can I add an island to my kitchen as a standalone project, or does it need to be part of a full remodel?
It depends on what the island includes. A simple cabinetry-and-countertop island with no plumbing or new electrical circuits can sometimes be added as a standalone project — if the floor plan accommodates it and the existing flooring can be extended or worked around. Add a sink, cooktop, or new electrical circuits and you're in permit territory with plumbing and electrical rough-in work involved. We're happy to assess your specific kitchen and give you an honest read on what's feasible as a standalone addition.
Keep Reading
Ready to design an island that actually works for how you live?
We've designed and built kitchen islands across Walnut Creek, Alamo, Danville, Lafayette, and Rossmoor for over 40 years. We'll help you figure out what your kitchen can actually support — and what your household will genuinely use — before anyone commits to anything.
Schedule a Consultation See Our Kitchen Work
Toupin Construction
Ready to start your remodel?
Whether you're dreaming of a new kitchen, a spa-worthy bathroom, or a whole-home transformation — we’d love to hear about your project. Reach out and let's talk.
‹ Back
Comments