


By using our website, you agree to the use of cookies as described in our Cookie Policy
Blog
Cabinetry 101: What Actually Matters When You're Choosing Cabinets
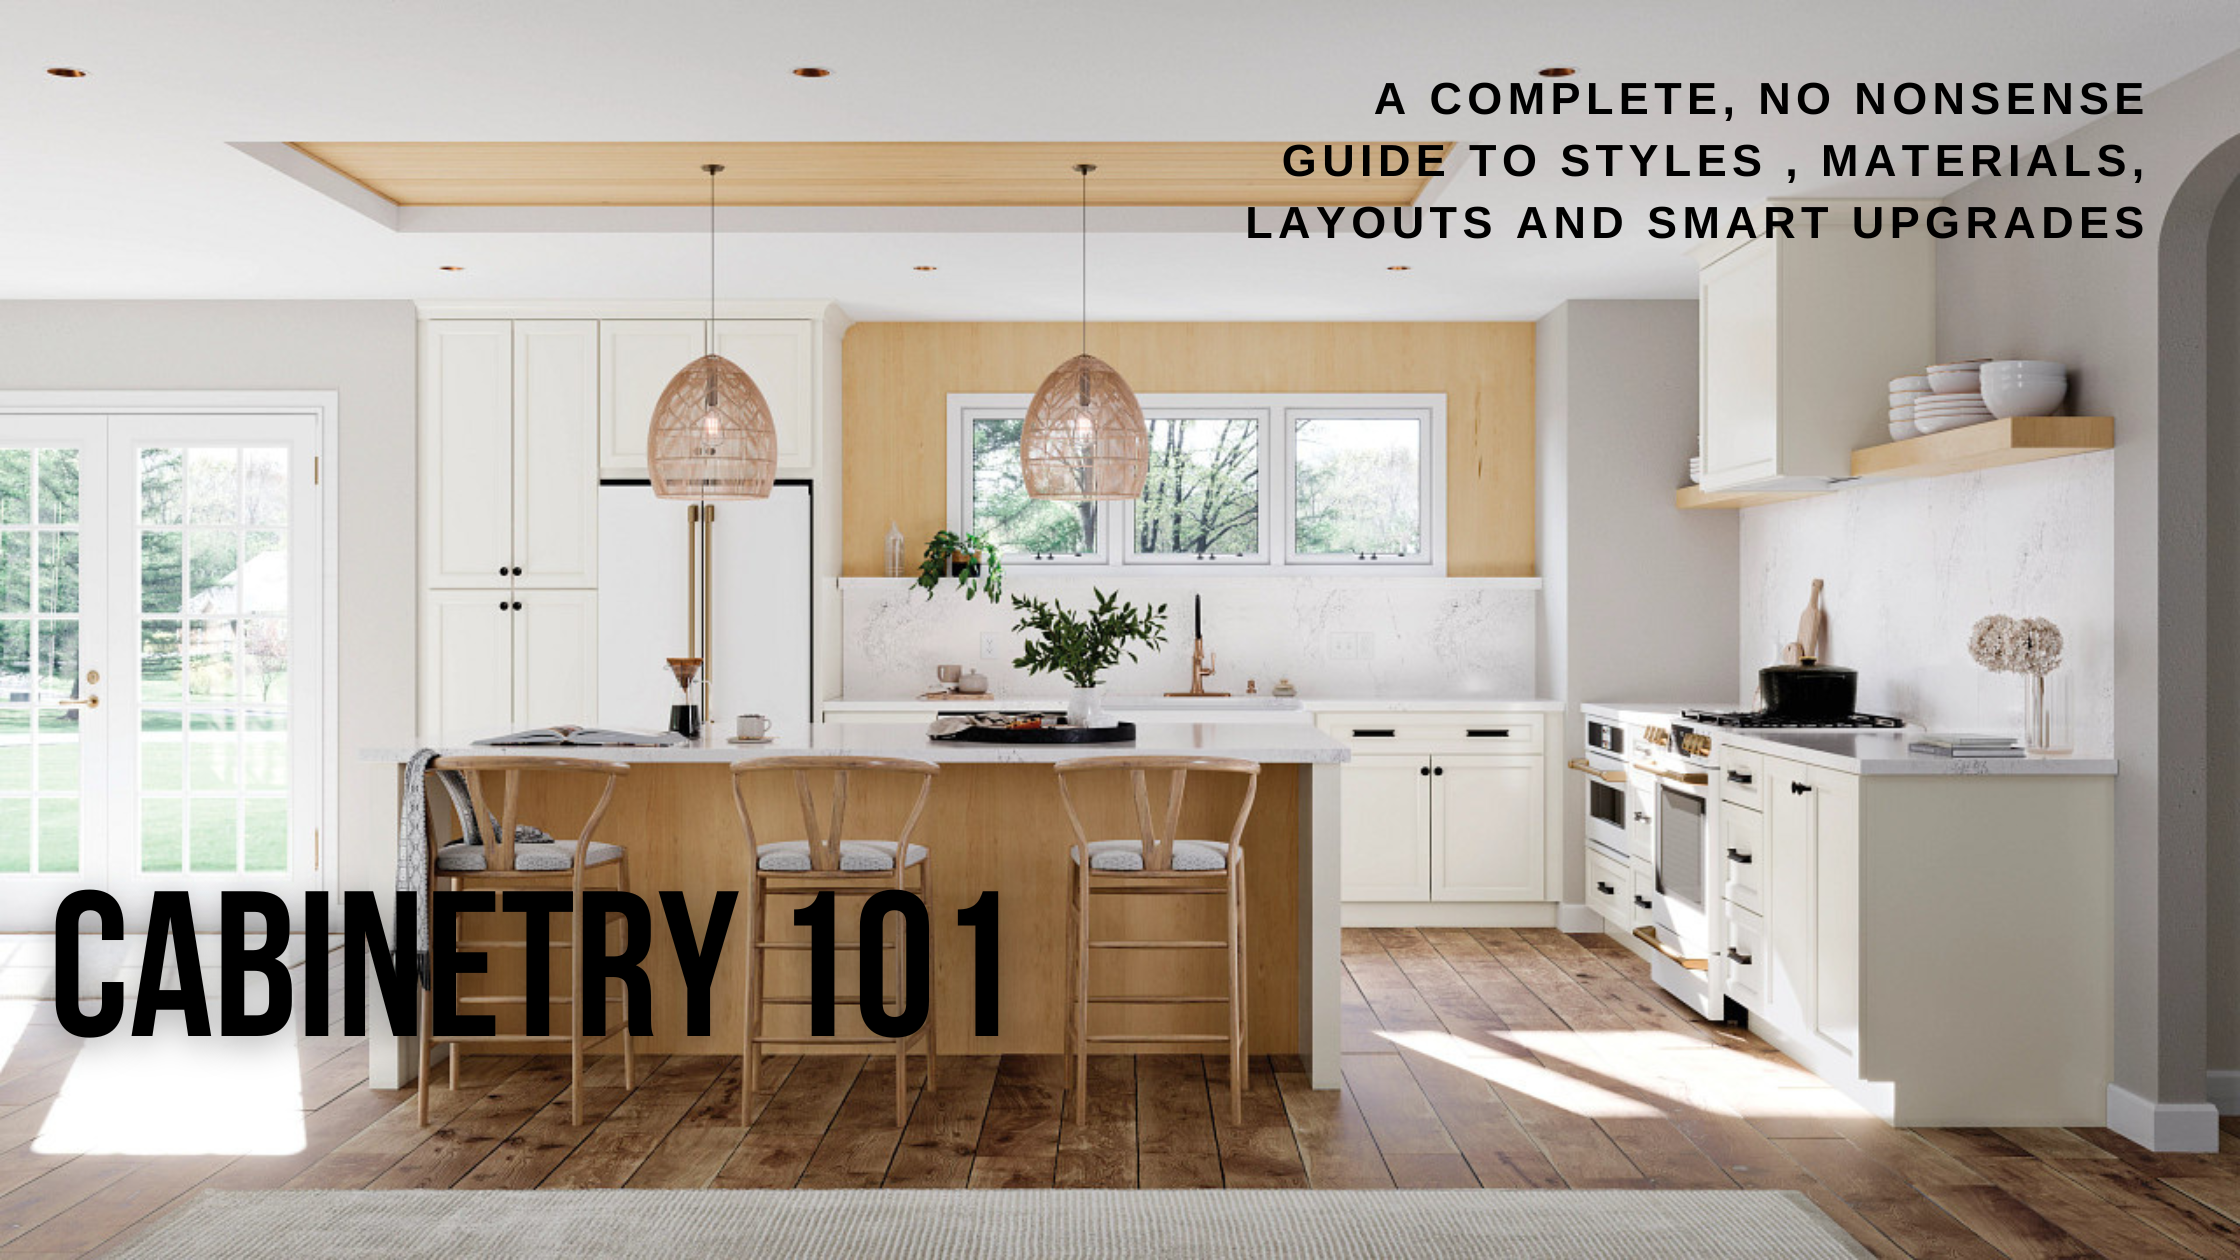
Cabinetry 101: What Actually Matters When You're Choosing Cabinets
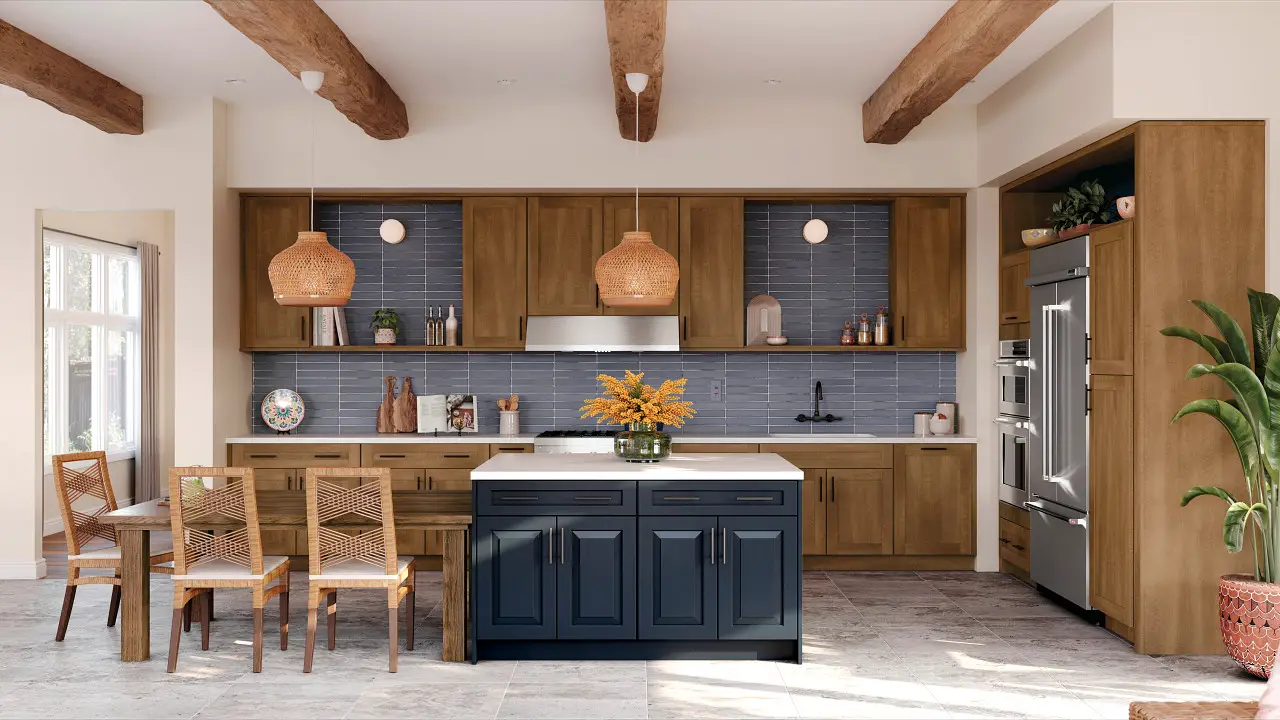
A warm, inviting kitchen featuring rich wood cabinetry paired with a deep navy painted island. The combination highlights the contrast between warm wood tones and cooler painted finishes, while a soft gray backsplash bridges the two. Exposed ceiling beams and woven pendant lighting add texture, making this a great example of mixing cabinet colors while maintaining balance.
A client came in last year for a kitchen consult and handed me a folder. Inside: 47 printed pages from Pinterest. Forty-seven. She'd been collecting cabinet inspiration for two years and was more confused than when she started. Every image was slightly different — different style, different finish, different hardware. She didn't need more inspiration. She needed a framework.
That's what this post is. After 40 years of installing cabinets in East Bay kitchens and bathrooms — in Rossmoor condos, Walnut Creek ramblers, Danville craftsmans, Lafayette colonials — we've gotten very clear on what actually matters and what's just noise. This isn't a glossary. It's the real decision sequence, with the context that helps you make good calls.
Construction First: What's Inside the Box
The most important thing about a cabinet is not the door style or the finish color. It's what's inside the box — literally. The box is the carcass: four sides, a back panel, and the internal structure that everything else hangs on. You'll look at the door every day, but the box is what determines whether your cabinets still feel solid in fifteen years or whether the drawer slides are grinding by year five.
Know the Lingo
Framed vs. Frameless Construction
A framed cabinet has a face frame — a rectangular border of solid wood attached to the front of the box. It gives you a traditional, furniture-like look, and you can choose inset doors (flush with the frame), partial overlay, or full overlay. A frameless cabinet — also called European or Euro-style — has no face frame. The door covers the entire box opening. This means wider drawer openings, more accessible interior space, and a cleaner, more modern look. Frameless requires more precise installation because there's no frame to hide small misalignments. Both are legitimate choices. Framed is warmer and more forgiving; frameless is more efficient and more contemporary.
Box material matters just as much as the frame style. Here's the honest breakdown:
| Material | What It Is | Best For | Watch Out For |
|---|---|---|---|
| Plywood | Cross-laminated wood layers — strong, light, holds screws well | High-quality boxes; our preferred spec | Costs more than particleboard |
| MDF | Medium-density fiberboard — dense, very smooth surface | Painted door fronts; extremely flat finish | Heavy; doesn't love moisture at edges |
| Particleboard | Compressed wood particles — budget-friendly, heavier | Lower-cost builds; light-duty storage | Weak at screw points; swells with moisture |
Toupin TipRun your hand along the inside of a box in the showroom. Then open a drawer and close it slowly. Plywood boxes have clean edges and a solid, consistent feel. Soft-close drawer slides that glide quietly without slamming are a sign that somebody thought about the hardware, not just the look. If the sample box feels cheap, the installed cabinets will too.
Drawers deserve their own mention because they're where you'll interact with your cabinets hundreds of times a week. Dovetail-jointed drawer boxes are the standard for quality — the corner joint locks mechanically, not just with glue. Pair those with full-extension, soft-close slides and you have a drawer that opens completely, closes quietly, and will still do so a decade from now. This is not a place to save money.
Wood Species and Finish: What to Choose for Your Goals
The species of wood you choose determines the grain character, the hardness, and — critically — whether you're staining or painting. These are related decisions, not separate ones. Choosing the wrong species for your finish goal is one of the more expensive mistakes we see clients make when they spec cabinets themselves.
If You're Painting
Choose Maple or MDF
- Maple is tight-grained and takes paint smoothly without grain telegraphing through
- MDF door fronts are the flattest surface you can paint — zero grain, zero movement
- Avoid oak for paint — the open grain shows through and you'll need multiple fill coats
If You're Staining
Choose for the Grain You Want
- Oak: pronounced, classic grain — warm, traditional East Bay kitchens
- Walnut: rich dark tones, beautiful figure — statement kitchens
- Hickory: hard, bold variation — rustic or high-contrast looks
- Cherry: subtle grain that deepens and warms over time
Finish topcoats matter too, and this is where we see long-term durability either win or lose. Catalyzed conversion varnish is the workhorse of professional cabinet finishing — it cures hard, resists cleaning products, and holds up to daily kitchen life. Lacquer gives a beautiful, repairable surface. Polyurethane is tough. Whatever topcoat your cabinet maker uses, ask about it specifically. "Painted finish" is not a spec. The topcoat is the spec.
Toupin TipThe finishes we see East Bay clients gravitating toward right now: soft warm whites, natural oak in wide grain, greige and warm taupe, deep navy on islands, and muted sage green on lowers with lighter uppers. Light uppers with a darker base cabinet is one of the most reliably successful combinations we install — it gives the kitchen visual weight at the counter level without closing down the upper half of the room.
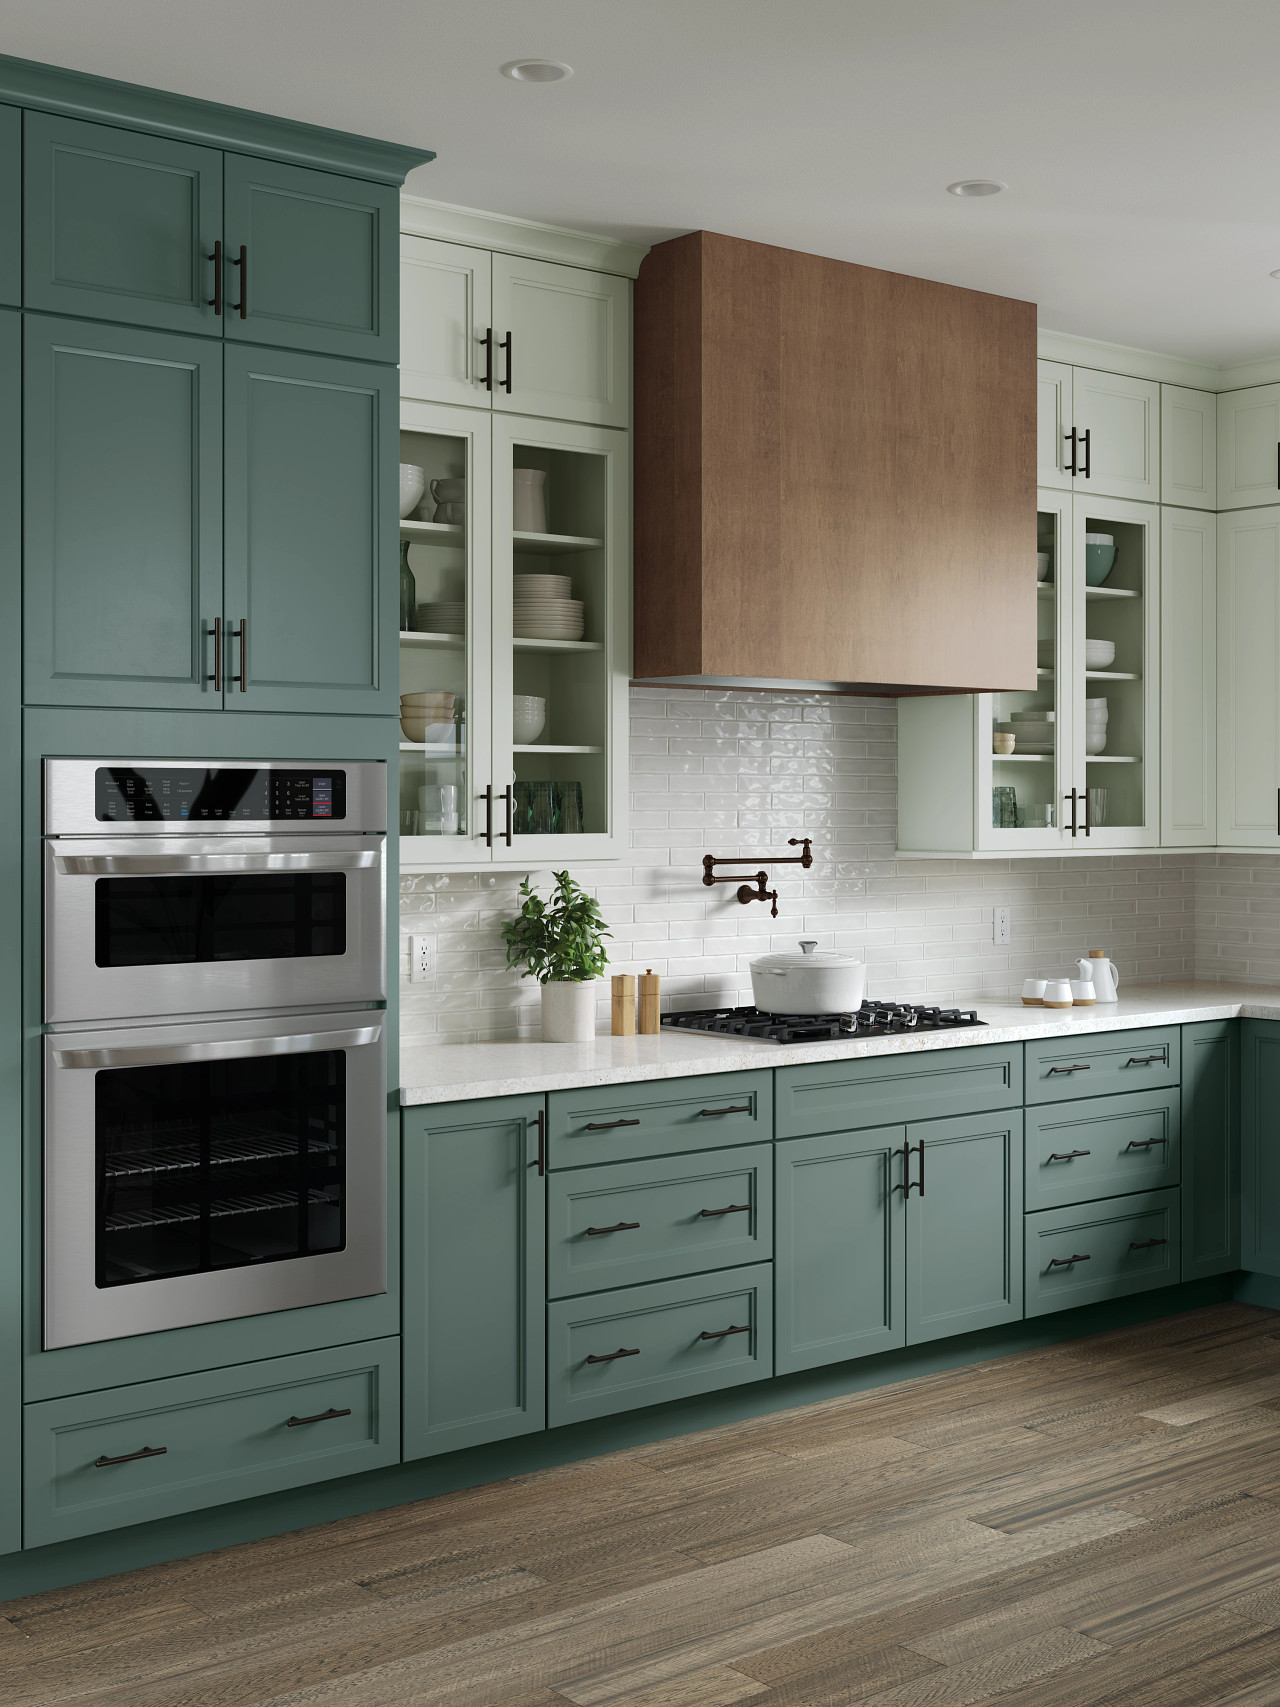
A stylish kitchen featuring soft green painted cabinetry paired with white upper cabinets and a natural wood range hood. The mix of finishes highlights how color can be used to create depth while still feeling cohesive. Light countertops and backsplash keep the space bright and balanced.
Door Styles: More Than Just Looks
The door is the face of your cabinet — the part that defines the kitchen's style at a glance. But door style also affects cleanability, visual weight, and how the kitchen reads from different distances. The choice that looks beautiful in a showroom might not be the right call for a Rossmoor kitchen where every square inch of visual space matters.
Slab
Completely flat door. Modern, minimal, wipes clean in one pass. Unforgiving of dents and dings — they show on a flat surface with nowhere to hide.
Shaker
Five-piece door with a recessed center panel. Works with almost everything — traditional, transitional, modern. The most versatile door style we install.
Raised Panel
Center panel raised above the frame. Classic, formal, traditional. More detail to clean around but timeless in the right kitchen.
Beadboard
Vertical groove detail on the center panel. Cottage and farmhouse feel. Charming in the right space; can feel busy in a larger kitchen.
Glass Front
Adds visual depth and lightens a wall of cabinetry. Works best with interior lighting. Shows what's inside — so what's inside matters.
Handle-less
Integrated finger rails or push-to-open latches. Sleek, modern, polarizing. Practical only if the mechanism is quality — cheap push latches fail fast.
A word on hardware: pulls for drawers, knobs for doors — that's the conventional wisdom, and it usually holds. More importantly, hardware is the jewelry of the kitchen. Brass and unlacquered bronze read warm. Brushed nickel and chrome read cool. Matte black sits neutrally in almost any palette. Whatever you choose, coordinate with your faucet and lighting fixtures — not necessarily match, but coordinate. Three different metal finishes in one kitchen looks accidental. Two, intentional.
Know the Lingo
Inset vs. Overlay Doors
An inset door sits flush inside the cabinet frame — fully recessed so the door face is level with the face frame. It's the most furniture-like, precise look, and it requires tight tolerances during both manufacturing and installation. A full-overlay door covers the entire face frame (or most of the box opening on frameless), creating a seamless wall of cabinetry. A partial overlay covers the frame partially, leaving a reveal of frame visible between doors. Inset is beautiful and expensive to do well. Full overlay is clean and forgiving. Most of what we install in East Bay remodels is full overlay shaker — it delivers the look people want without the cost premium of inset.
Layout: Where Cabinets Go and Why It Matters
You can have the most beautiful cabinets in the world and still have a kitchen that's exhausting to cook in. Layout is the difference between a kitchen that works with you and one that works against you every single time you try to get dinner on the table.
The most useful framework is the work triangle: the distance between your sink, range, and refrigerator. When those three points are too far apart, you're walking more than you're cooking. Too close and you're constantly bumping into yourself or whoever else is in the kitchen. The sweet spot is a total triangle perimeter of 12–26 feet, with no single leg under 4 feet or over 9.
| Layout | Best For | What We See in East Bay Homes |
|---|---|---|
| L-Shape | Open floor plans, kitchen-living flow | Very common in Walnut Creek and Danville — especially post-wall-removal remodels |
| U-Shape | Maximum storage and counter space | Larger single-family homes; less common in Rossmoor condos due to space constraints |
| Galley | Efficient workflow in narrow spaces | Common in Rossmoor units; works beautifully when the corridor is wide enough |
| Island | Landing zones, seating, social cooking | The most-requested addition in current Walnut Creek remodels — needs 42" minimum clearance on all sides |
Drawer placement is where most layout planning falls short. Doors are intuitive — you see them, you open them. Drawers require you to think in advance about what goes where. Pot and pan drawers directly below the cooktop. Cutlery and utensil drawers next to the prep zone. Pull-out trash under or near the sink. Spice pull-out beside the range. When these are in the wrong place, you work around them forever. When they're right, you stop thinking about storage and start thinking about cooking.
Toupin TipMore drawers, fewer doors. Almost universally. Pulling open a drawer to see everything laid flat beats opening a door and rummaging through a dark cabinet every single time. If you're on the fence about adding a drawer base somewhere, add it. The clients who regret their cabinet decisions almost never say "I put in too many drawers."
For Rossmoor remodels specifically, corner solutions deserve extra planning time. Blind-corner pull-outs, swing-out shelves, and lazy Susans all have different tradeoffs in terms of accessible depth and ease of use. In a Rossmoor galley kitchen where every linear foot is accounted for, we spend real time on corner planning — because a poorly designed corner can swallow 20% of your usable storage space. Our full condo remodeling page has more on how we approach these space constraints.
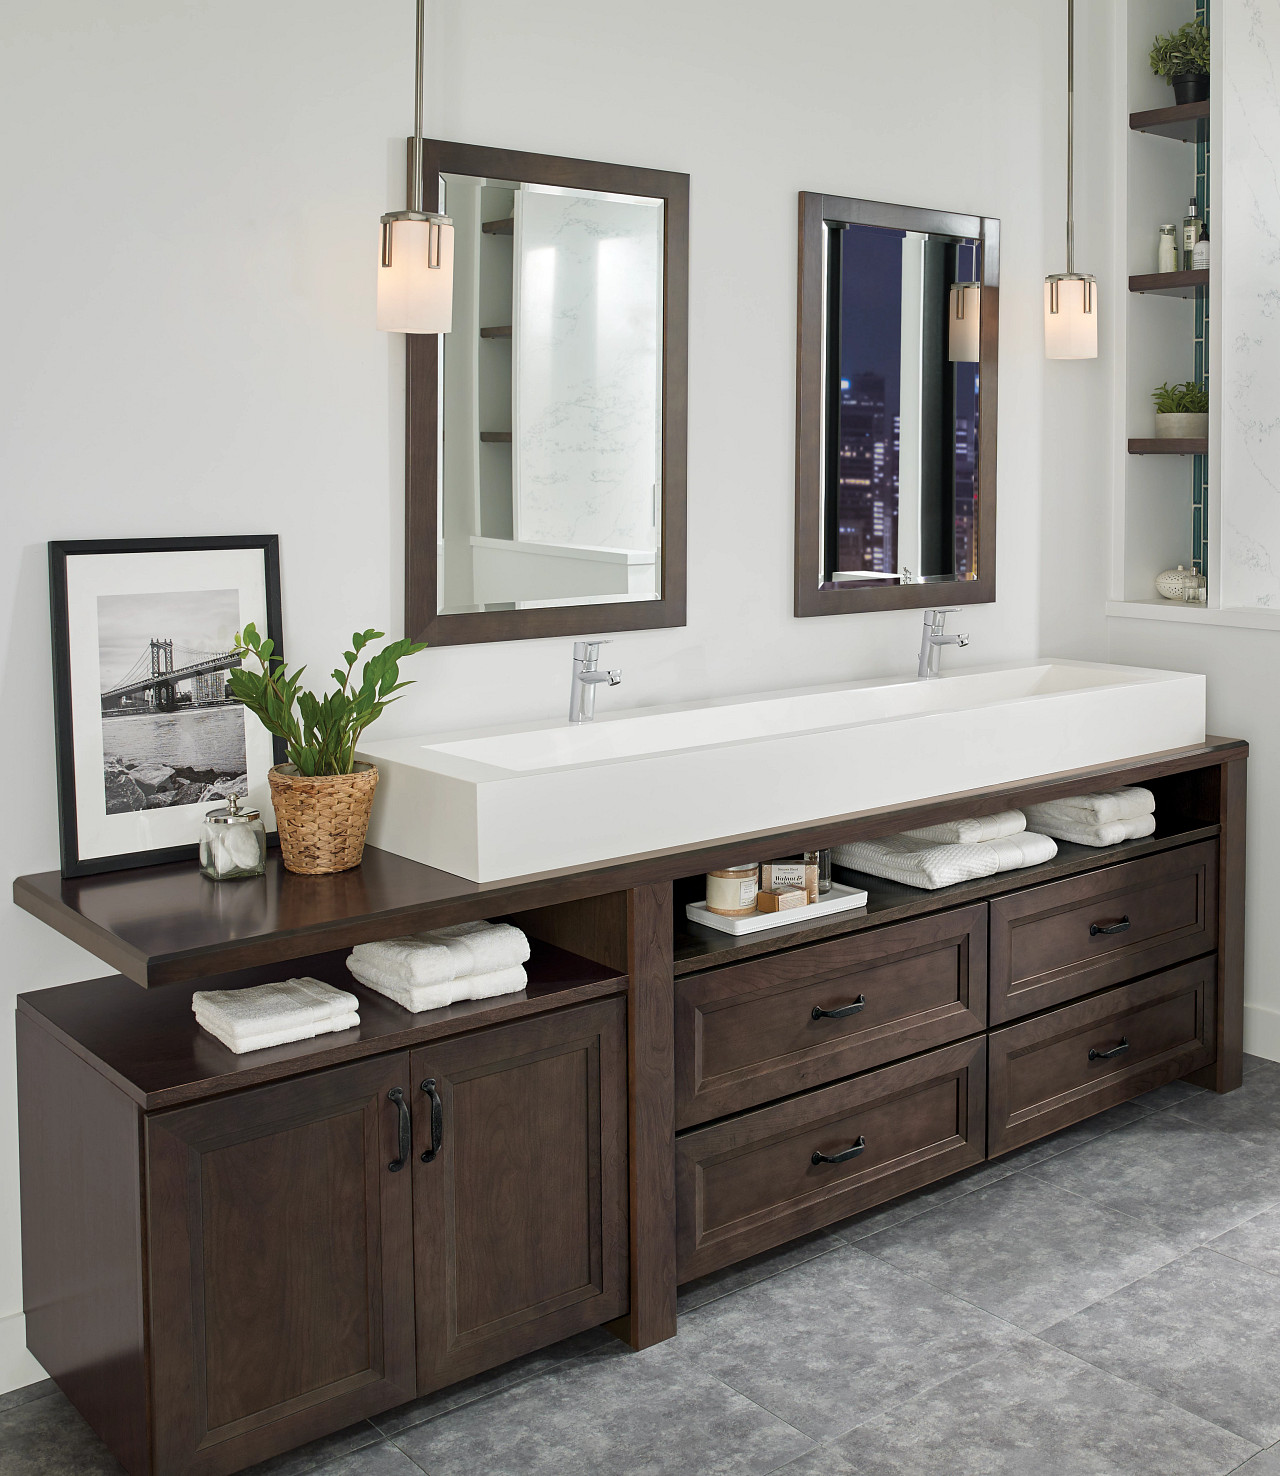
A modern bathroom showcasing a dark wood double vanity paired with clean white countertops and walls. The deep cabinet finish adds richness and contrast, while sleek fixtures and minimal styling keep the look fresh and contemporary. A perfect example of using darker cabinetry to ground a light space.
Stock, Semi-Custom, or Custom: Knowing Which Tier You Actually Need
This is the decision that sets your budget ceiling before you've looked at a single door style. And it's a decision a lot of homeowners make too quickly — either assuming they need custom when they don't, or going stock when their kitchen really needed more flexibility. Here's the honest breakdown:
Tier 1
Stock
Off-the-shelf at home improvement stores. Fixed sizes, limited finishes. Ships fast and costs the least. Fine for a rental or a secondary space where function beats form.
Our Most Common · Tier 2
Semi-Custom
Size modifications available, wider finish and style options, better hardware and box materials. The sweet spot for most East Bay remodels — enough flexibility to fit real rooms without custom pricing.
Tier 3
Custom
Exact specs, furniture-quality detail, unusual heights or layouts, inset doors, specialty species. Earns its cost in challenging spaces and high-design kitchens where semi-custom can't get there.
For most of our Walnut Creek and East Bay projects, semi-custom is where we live. The rooms aren't perfect rectangles — ceilings have soffits, walls have quirks, older homes have out-of-square corners that stock cabinets can't accommodate cleanly. Semi-custom gives us the size flexibility to fill a room properly without the lead time and cost of a full custom order.
That said, there are specific situations where custom earns every dollar: an older Rossmoor unit with unusual ceiling heights, a kitchen where the homeowner wants furniture-quality inset doors and a specific species that no semi-custom line carries, or a layout with unusual angles that standard box sizes simply can't fill. If you're not sure which tier your project needs, that's a good question to bring to a consultation — the answer depends heavily on your specific space.
Upgrades Worth Paying For (and the Ones That Aren't)
Cabinet upgrades are where budgets balloon fast, because there are a lot of them and they're easy to add incrementally without noticing how quickly the total climbs. Here's our honest take on which ones make a real daily difference and which ones look good on a spec sheet.
✓ Worth It
Upgrades We Recommend
- Soft-close hinges and slides — the single most impactful quality-of-life upgrade. Do not skip this.
- Full-extension drawer slides — you can actually see and reach the back of the drawer
- Dovetail drawer boxes — mechanical joint that holds; glued joints eventually fail
- Pull-out trash/recycle — a trash can on the floor is wasted space every time
- Under-cabinet LED lighting — transforms task lighting; install at rough-in, not as an afterthought
- Deep pot drawers — one drawer base replaces a cabinet that was a nightmare to use
✗ Proceed Carefully
Upgrades to Think Twice About
- Charging drawers — technology changes; what you need to charge in five years may not fit
- Appliance garages with doors — useful only if you actually use the appliance regularly
- Very dark or very trendy finishes — function over fashion; you live with this for 15+ years
- Glass fronts without interior lighting — dark interiors make glass fronts look worse than solid doors
- Push-to-open hardware on cheap mechanisms — fails fast; spend on the mechanism if you want handle-less
Lighting specifically deserves a longer conversation than it usually gets in cabinet planning. Under-cabinet LED strips — positioned toward the front rail, not the back — cut the shadow zone on your countertop that makes prep work harder than it needs to be. Add a dimmer and you have a kitchen that works at 7am making coffee and at 10pm having a glass of wine. This is an upgrade almost universally worth doing, and it's far cheaper to rough in the wiring during a remodel than to add it after the fact.
Toupin TipFor aging-in-place or accessibility-focused kitchens — which we do a lot of in Rossmoor — the upgrades that matter most are different: full-extension drawers at lower heights, D-shaped pulls that don't require a tight grip, knee space under at least one prep area, and pull-down shelf systems for upper cabinet access. These aren't specialty features; they're good design for everyone. Read more on our ADA and accessibility remodeling page.
The Mistakes We See Most Often
Forty years of remodeling means forty years of watching well-intentioned decisions go sideways. These are the cabinet planning mistakes we see most often — and the ones that are entirely avoidable with a little advance thinking.
-
Not accounting for out-of-level floors and out-of-plumb walls. Older East Bay homes — especially anything built before 1985 — have settled. Walls aren't perfectly plumb. Floors aren't perfectly level. Cabinets that are installed without shimming and adjusting look crooked, and doors and drawers don't align correctly. This is a craftsmanship issue, not a product issue — but it's worth asking your installer about specifically.
-
Skipping fillers and not planning appliance clearances. Fillers are the narrow strips of cabinet material that fill gaps between cabinet runs and walls, or between cabinets and appliances. Skipping them leaves visible gaps. Not planning clearances means your dishwasher door opens into a base cabinet, or your refrigerator can't be pulled out for service. These are planning issues, not installation issues — they need to happen on paper, not on site.
-
Under-planning drawer depth and dividers. Clients often plan the number of drawers but not the internal organization. A 24-inch-wide drawer with no divider becomes a junk drawer within six months. Think about what goes in each drawer before you order — cutlery tray, spice insert, knife block, utensil divider — and spec those at order time, not after installation.
-
Ignoring ventilation near the range. Steam and grease are hard on cabinet finishes, especially on uppers above the range. Make sure your range hood is sized correctly for your cooktop's BTU output, and that it actually vents to the outside — not recirculating. Cabinets adjacent to a poorly ventilated range will show wear far faster than the rest of the kitchen.
-
Choosing finish before confirming the topcoat. "Painted white cabinets" is not a spec. The topcoat — catalyzed conversion varnish, lacquer, polyurethane — determines how the finish holds up to cleaning, grease, and daily contact. Ask specifically what topcoat is being applied and what the warranty covers. Cheap topcoats yellow, chip, and dull. Quality topcoats look the same at year ten as they did at installation.
"The clients who regret their cabinet decisions almost never say 'I put in too many drawers.' More drawers, fewer doors. Almost universally."
Refacing vs. Replacing: The Question Worth Asking First
Before you replace every cabinet in your kitchen, stop and ask one question: are the boxes in good shape? If the answer is yes — they're plumb, the interiors are clean, the box structure is solid — you may have a strong candidate for cabinet refacing instead of full replacement.
Refacing means keeping your existing box structure and replacing the door fronts, drawer fronts, and veneering the visible frame surfaces. You also swap hardware. The result looks like a new kitchen. The cost is substantially less than tearing out and replacing everything. The timeline is shorter. The disruption is less.
It's not the right call for everyone. If your layout is wrong — if the kitchen doesn't work for how you actually cook — refacing fixes the look but not the problem. If the boxes are damaged, swollen from moisture, or structurally compromised, refacing puts new faces on a bad foundation. But if the bones are good and your issue is that the kitchen looks dated? Refacing is worth a serious conversation. We've written a detailed post on cabinet refacing vs. replacing if you want to go deeper.
Toupin TipIf you're unsure whether your boxes are worth keeping, have a contractor look at the interior — not just the exterior. Pull a drawer all the way out and check the sides of the box for swelling, delamination, or soft spots. Look at the corner joints. These take about five minutes to assess and tell you almost everything you need to know about whether the box has another decade in it.
Ready to Talk Through Your Cabinet Project?
Whether you're replacing everything, refacing what's there, or just trying to figure out which direction makes sense — we've had this conversation hundreds of times. We'll look at your space, your goals, and your budget and give you a straight answer. No showroom pressure, no upsell. Just 40 years of knowing what works in East Bay homes.
Get a Free ConsultationOr call: 925-937-4200 · CA Lic #626819
Toupin Construction
Ready to start your remodel?
Whether you're dreaming of a new kitchen, a spa-worthy bathroom, or a whole-home transformation — we’d love to hear about your project. Reach out and let's talk.
‹ Back
Comments