

By using our website, you agree to the use of cookies as described in our Cookie Policy
Blog
The Complete Bathroom Remodel Guide for Bay Area Homes
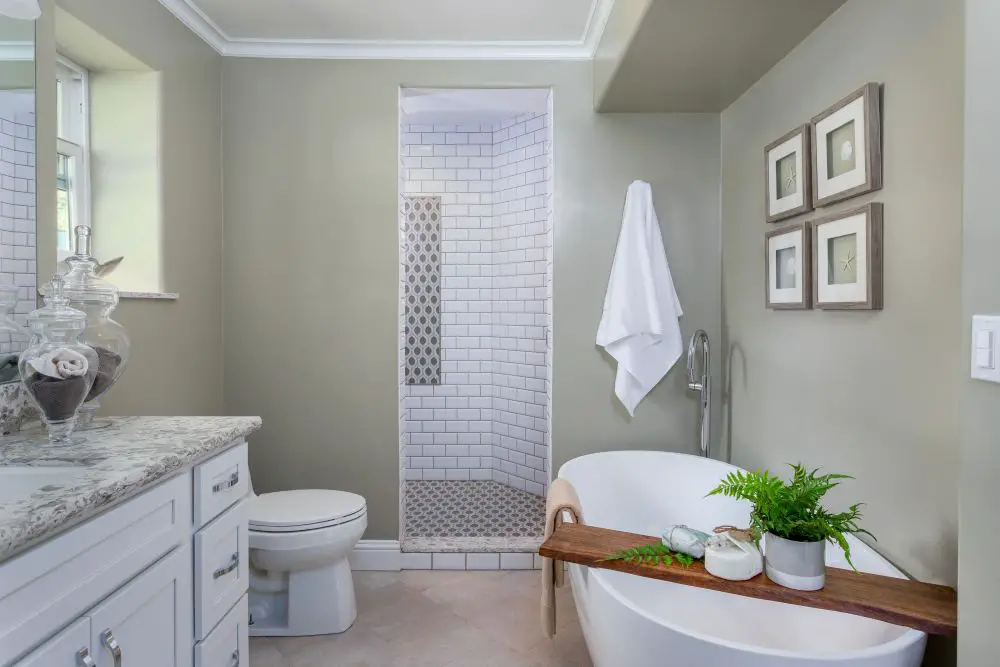
Calm, spa-inspired bathroom remodel featuring a freestanding soaking tub, walk-in shower with white subway tile and niche detail, and soft neutral finishes.
A client called me once to ask why her bathroom quote was higher than what she'd read online. She'd seen articles suggesting a "typical bathroom remodel" runs $10,000–$15,000. Her quote was closer to $45,000. She thought something was wrong.
Nothing was wrong. She was in Walnut Creek, not Wichita.
This guide is for Bay Area homeowners who want honest information about what a bathroom remodel actually involves — the cost, the process, the decisions, and the things that can derail a project if you're not paying attention. We've been doing this for over 40 years. Here's what we know.
What Does a Bay Area Bathroom Remodel Actually Cost?
The range is wide because "bathroom remodel" covers everything from a cosmetic refresh in a powder room to a full gut of a primary bath. Here's how East Bay projects break down in real numbers:
Bay Area Bathroom Remodel Cost Ranges (2025–2026)
Powder Room Refresh (fixtures, paint, vanity)$8,000 – $18,000
Full Guest Bathroom Remodel$20,000 – $40,000
Primary Bath Remodel (mid-range finishes)$35,000 – $65,000
Primary Bath Remodel (custom/spa-level)$65,000 – $120,000+
Tile (materials + labor)$4,000 – $15,000+
Plumbing (fixture swap + rough-in changes)$2,500 – $9,000
Vanity + Countertop$1,500 – $8,000
Shower Enclosure / Frameless Glass$2,500 – $7,000
Electrical + Ventilation Updates$1,500 – $5,000
These figures reflect actual East Bay market conditions. National averages are not useful here — our labor rates, permit costs, and material pricing are different from the rest of the country.
What moves the needle most: tile choice, whether you're moving plumbing, the type of shower system, and what the walls look like when we open them up. That last one is always a wildcard in older homes.
A note for Rossmoor residents
Rossmoor is a co-op community — which means your Mutual board has approval authority over exterior modifications and structural work. Bathrooms are usually fine without board involvement, but if you're looking at a wall removal or any work that affects shared infrastructure, that process needs to start before we do.
We've done a lot of Rossmoor remodels. The homes were built in the '60s and early '70s, and we almost always find galvanized pipes, original tile on cement board, and single-wall vent stacks that need updating. Budget for it. We'll tell you what we find before we proceed.
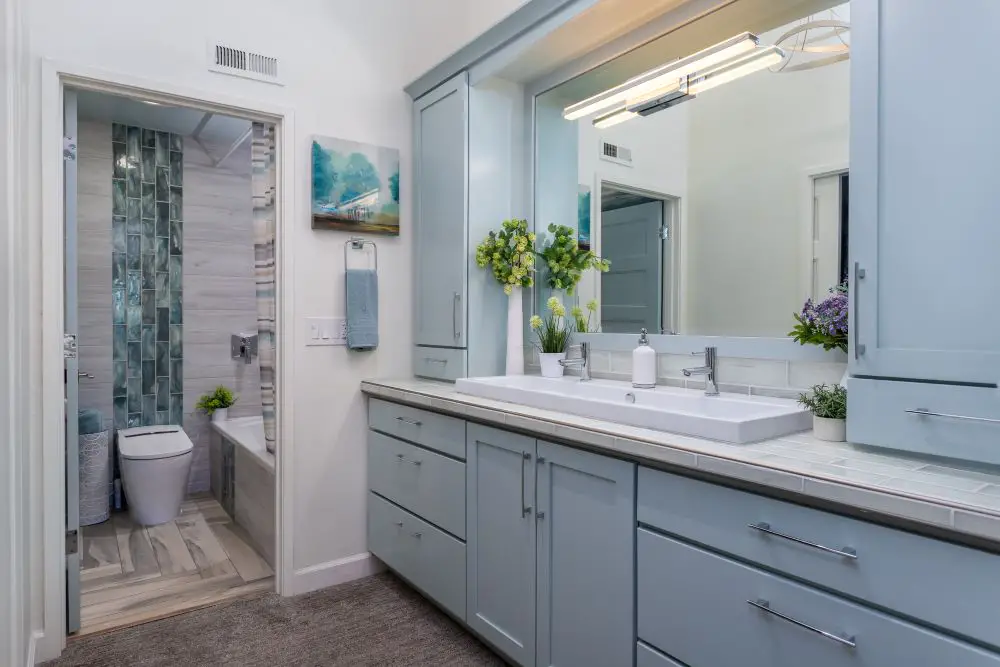
Bright bathroom remodel with a double vanity, soft blue cabinetry, large framed mirror, and modern lighting, paired with a tiled shower in the adjoining space.
The Remodel Process, Step by Step
Here's what actually happens, in order, so you know what you're getting into:
1
Design & Selection
We measure, we draw, we source. You make decisions on tile, fixtures, vanity, shower type, hardware, and paint. This phase takes 2–4 weeks minimum — don't rush it. Changes are cheap on paper and expensive in the field.
2
Permits & Lead Times
For bathrooms with plumbing, electrical, or ventilation changes, we pull permits in Contra Costa County. Simultaneously, custom tiles and vanities get ordered — some materials have 6–10 week lead times. We time this so materials arrive when we're ready for them.
3
Demo
Everything comes out. The old tile, the tub, the vanity, sometimes the subfloor. This is where we find out what's really behind the walls — and where surprises either are or aren't. We document everything before we close it back up.
4
Rough-In Work
Plumbing and electrical get roughed in, inspected, and approved. This is the unglamorous phase — but it's the most important one. Doing this right is what makes everything else last.
5
Waterproofing & Backer
Before any tile goes up, we waterproof all wet areas. This is a step that separates a bathroom built to last from one that starts leaking in five years. We don't skip it, and we don't rush it.
6
Tile, Fixtures & Finishes
The part everyone's been waiting for. Tile goes down. The vanity and countertop go in. Fixtures get set. Hardware gets installed. This is where the design you chose on paper becomes real.
7
Final Inspection & Punch List
The city inspector signs off. We walk through with you and address anything that needs touching up. You don't get our final invoice until you're happy with the result.
Choosing Your Tile: More Than Just a Look
Tile is where most people make their first big design decision — and where they also make some of the most common mistakes. Here's what we tell clients:
Size matters more than you think
Large-format tiles (24"×24" and bigger) look dramatic and feel modern. But they require a flatter subfloor to install correctly — and in older Bay Area homes, that subfloor is rarely as flat as it needs to be. Getting it right adds labor cost but prevents cracking. We'll tell you if your floor can handle what you're picturing.
Trade Jargon: "Waterproofing Membrane"
A waterproofing membrane is a flexible, moisture-blocking layer that goes between your backer board and the tile in wet areas like showers and tub surrounds. Think of it as the immune system of your shower — it keeps water where it belongs. Without it, moisture eventually finds its way into the wall cavity, and you end up with mold, rot, and a bathroom remodel in a few years.
Grout choice is a maintenance decision
Sanded grout is standard and looks great — but it requires sealing and occasional maintenance. Epoxy grout costs more upfront but is nearly maintenance-free and holds up better in high-use showers. We're big fans of epoxy for shower floors and any horizontal surface where water sits.
Pattern adds cost — but sometimes it's worth it
A herringbone or chevron layout requires more cuts and takes longer to install than a straight-set field tile. That's a real labor cost add. If you're pattern-curious, consider using it as an accent on one wall rather than throughout — you get the visual impact without the full price of doing the whole shower in a complex layout.
Fixtures: Where Daily Life Meets Design
Fixtures are what you touch every single day. This isn't the place to cut corners to save $200. Here's how to think about the big ones:
The shower system
A basic pressure-balance valve with a fixed showerhead is the minimum. A thermostatic system lets you set an exact temperature so you're not scalded when someone flushes the toilet. If you're investing in a full primary bath remodel, the thermostatic system is a upgrade we consistently recommend — it's the thing people thank us for two years later.
The vanity
Your vanity does double duty: storage and visual anchor. In a small bathroom, a wall-hung vanity creates the illusion of more floor space and makes cleaning easier. In a primary bath, a double-sink vanity with good drawer organization can eliminate about 40% of the arguments in a household. (We've done the math. Informally.)
Lighting
Side-mounted sconces at face height are far better for grooming than a single overhead light, which creates shadows in exactly the wrong places. If you're redoing the electrical anyway, do the lighting right. A backlit mirror is a favorite among our clients — it looks clean and provides even, flattering light without any visible fixtures.
California Code: What You're Required to Do
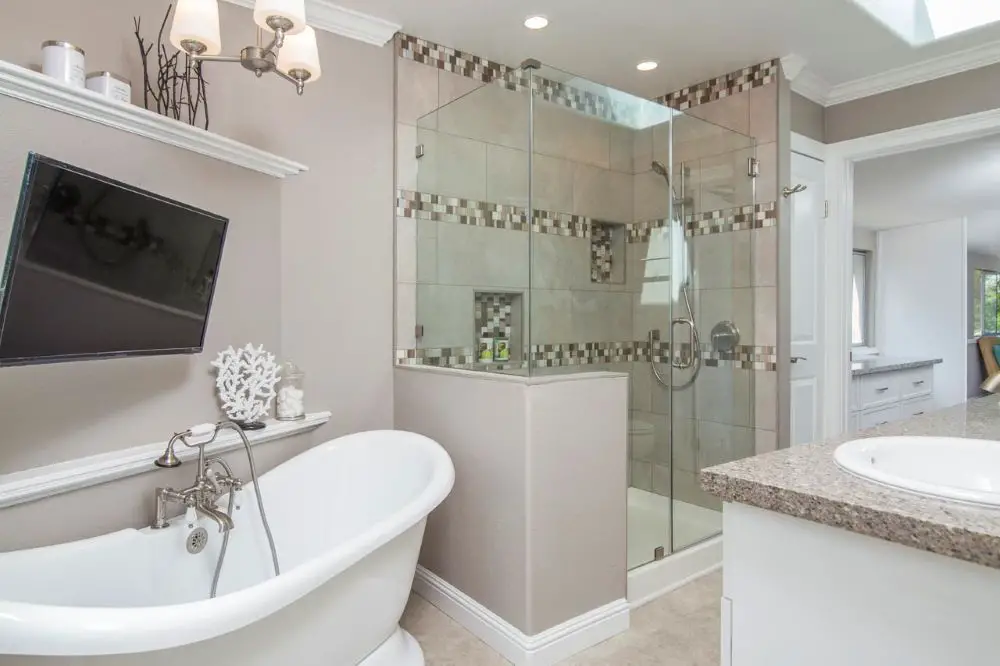
Elegant bathroom remodel with a freestanding tub, glass-enclosed shower, and decorative tile accent band, creating a clean and timeless design.
California has some of the most specific building codes in the country, and bathrooms touch several of them. Here's what you need to know before we start:
Ventilation
Every bathroom must have either a window to the outside or a mechanical exhaust fan that vents to the exterior. Not a recirculating fan — one that actually exhausts outside. In older East Bay homes, the original fan often vents into the attic, which is a code violation and a mold waiting to happen. We reroute the duct as part of every remodel where this is the case.
Electrical safety
GFCI protection is required for all outlets within 6 feet of a water source in a bathroom. Lighting over the shower must be rated for wet or damp locations — standard fixtures don't cut it. These aren't optional if you're pulling permits, and you should be pulling permits.
Accessibility
If you're planning ahead for aging in place — or if anyone in the household has mobility needs — there are specific dimensions for doorways, turning radius, grab bar blocking, and curbless shower entries that make a bathroom genuinely safe and functional. We do a lot of this work in Rossmoor and Walnut Creek. It doesn't have to look clinical.
What You Can DIY — and What You Absolutely Shouldn't
✓ Fine to DIY
- Paint and accessories
- Hardware swaps (towel bars, toilet paper holder)
- Mirror and art installation
- Basic fixture swaps if you know what you're doing
- Organizing and styling
✕ Hire a pro
- Any plumbing beyond a fixture swap
- Electrical work of any kind
- Waterproofing and backer installation
- Tile work (especially floors and showers)
- Structural or wall removal
- Ventilation rerouting
Here's why the "hire a pro" list matters so much: waterproofing in a shower is not intuitive. It looks simple — you apply a membrane and let it dry. But if the seams aren't overlapped correctly, if the corners aren't properly treated, if the tile substrate isn't the right material for a wet area, you end up with water in your wall cavity. That's a full tear-out and redo, plus possible mold remediation. The cost of doing it wrong is always higher than the cost of doing it right the first time.
"We've demolished bathrooms where the previous owner tried to save money on tile installation. The demo cost alone was more than hiring a qualified tile setter would have been."
Smart Upgrades Worth Considering
A few additions that our clients are consistently glad they included — especially when the walls are already open:
In-floor radiant heat
An electric radiant mat goes under the tile and connects to a programmable thermostat. The floor is warm when you step out of the shower. It adds $800–$2,500 depending on bathroom size, and nobody has ever regretted it. Plan it during rough-in so the electrical is already in place.
Blocking for future grab bars
Even if you don't need grab bars now, having blocking installed in the walls during the remodel costs almost nothing — and makes installation trivial later. Without it, adding a bar means opening the wall or finding a stud in exactly the right place. We include this on every project where the client is over 50. We include it on most projects anyway.
A niche or two in the shower
A recessed shelf built into the shower wall for shampoo and soap is one of those things that sounds minor until you've lived with one for six months. It eliminates the wire caddy that corrodes and falls over. Plan it before the tile goes up — adding it after is a much bigger job.
Frequently Asked Questions
Do I need a permit to remodel a bathroom in Walnut Creek?
If you're doing any plumbing, electrical, or ventilation work — yes, permits are required. Cosmetic updates like paint, mirrors, and hardware swaps generally don't need permits. We handle all permit applications and inspections as part of our projects.
How long does a full bathroom remodel take?
Design and material selection: 2–4 weeks. Permitting and lead times: 4–8 weeks. Construction: 3–6 weeks depending on scope. Total from first meeting to move-in: 3–5 months for most full remodels. We set a construction schedule before we start and stick to it.
What's the biggest budget mistake people make?
Not leaving a contingency. For any bathroom in a home built before 1985, we recommend setting aside 10–15% of your budget for surprises behind the walls. We find something unexpected in the majority of older East Bay bathrooms. Having that buffer means the project stays on track instead of stalling at the worst possible moment.
Is a bathroom remodel worth it for resale?
Primary bath remodels consistently deliver strong ROI in the East Bay — typically in the 60–70% range. But beyond the numbers, a dated bathroom is a real liability when buyers are walking through. A well-done remodel removes an objection rather than just adding a feature.
We're in Rossmoor — do we need Mutual approval before we start?
For interior bathroom work that doesn't touch shared walls or building structure, you typically don't. But the rules vary by Mutual, and we'd rather confirm before we start than find out mid-project. We've navigated the Rossmoor approval process many times — it's part of how we work in that community.
Let's Talk About Your Bathroom
Whether you're in the early daydreaming phase or you've got a stack of tile samples already, we'd love to sit down and look at the space with you. No pressure — just an honest conversation about what's possible and what it'll cost.
925-937-4200Toupin Construction · CA Lic #626819 · Walnut Creek, CA

Toupin Construction
Ready to start your remodel?
Whether you're dreaming of a new kitchen, a spa-worthy bathroom, or a whole-home transformation — we’d love to hear about your project. Reach out and let's talk.
‹ Back
Comments